How to Use Community Prioritization Boards to Make Decisions
Decision making is tough enough as an individual, and it’s even tougher as a community.
You want to be as inclusive as possible when making decisions as a community organization, but at the same time, you likely don’t have the resources to try a whole lot of new ideas.
You can find out which ideas resonate most with your community using a tool we call Community Prioritization Boards.
Solicit feedback from your community by presenting members with eight unique ideas. Ask them to vote for their favourites by placing a dot sticker on the board.
We usually include a spot for written comments on the board too to add local context:
how might we implement this idea in our community?
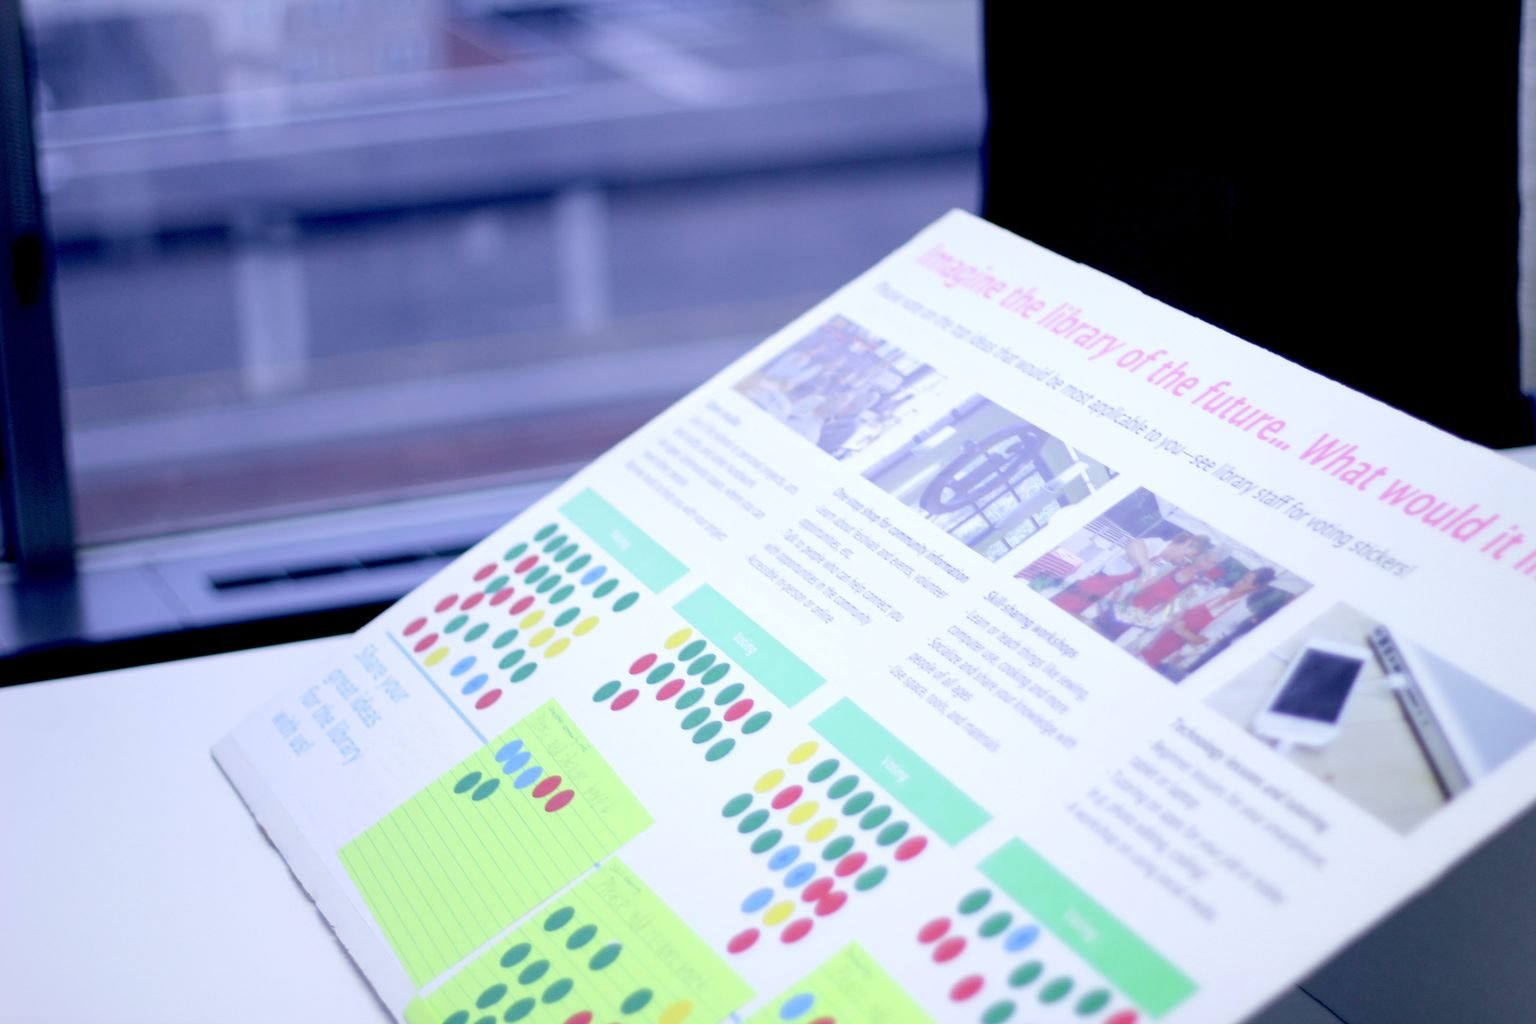
We’ll set up these boards at community events, libraries, or other community buildings. One board holds four ideas and looks something like the image below:

Setting Up Your Community Prioritization BoardS
Once you’ve selected your eight ideas and designed a prioritization sheet like the one above (using two sheets for the eight ideas), you can prepare the physical boards.
Looking for ideas for your library? Check out this list of 5 great community-generated ideas for libraries.
There are any number of ways you can set this up, but this our go-to. It’s hard to miss and is a good size for multiple people to interact with at once (especially for people with vision and motor challenges).
You’ll need two poster boards per station for your eight ideas. The ones we use look like something you would find at a conference or science fair. Make sure that you design and print the prioritization sheets to match the size of the large centre portion of the board.
1. Print the prioritization sheets
Because you want big, visible boards, you’ll likely have to outsource the printing. Once printed, use an adhesive (we use spray-adhesive) to paste the sheets with your ideas to the centre of the board.
2. Construct the Boards
Open the front, fold both flaps back, and use a 12” (30 cm) piece of tape to attach the flaps together behind the poster board.

3. Place Your Boards
If you’re setting up a station in a library, find a central location that has help close at hand. This way, library staff can step in to help and request feedback when they see people engaging with the boards.
Place the boards on a table:
the flap attached to the front/bottom of the poster board will lay flat, parallel to the table
the flap attached to the top/back of the poster board will be perpendicular to the table, raising the back of the poster board up off the table
the poster board should be angled in a way that enables participants to interact with the front of the table/poster board.

Voting With COMMUNITY PRIORITIZATION BOARDS
Every participant who comes through the booth gets three dots. You can use different colours to represent participants’ demographic information (Ex. youth votes are yellow dots, older adult votes are blue dots, etc).
Participants may power vote on one idea by putting all 3 dots on the same idea, or they can spread them out across multiple ideas.
Community Prioritization boards may appear at multiple events within a community.
Feedback forms
It’s a good idea to ask participants to fill out a feedback form as well. It helps us understand why people voted the way that they did.
We ask:
What was your favourite idea?
What did you like about this idea?
What could we improve about this idea?
What questions do you have about this idea?
What new ideas do you have? (Either expanding on this idea or a brand new idea of your own).
You may need to say these questions out loud to participants.
You can download our free Feedback Grid template here:
4c47ced8-1f3b-4b7c-9a05-60d74d2d23ef
Wrap up
Once we’ve collected the information we need, we tally up the results.

If it’s easy enough to do, count how many of each dot there are (making sure to keep track of demographic breakdown, if you colour-coded your dots that way) and record the numbers. This should give you a fairly clear picture of your community members’ priorities, based on whichever demographics you deem relevant.
Typically, we focus on age and permanent residents vs. passers-through. Sometimes we’ll also focus on those who go to the library regularly and those who don’t (based on whether or not you take your prioritization board out to community events).
Community prioritization boards are a fun and simple way to give voice to your patrons. What are some other ways you might solicit feedback from your community members?
Here are some other design tools that will help you make effective decisions and understand your community members better:
75 Design Thinking Tools and Resources Explained